

Step by step guide to easily configure a custom start and stop schedules for Amazon Elastic Compute Cloud (Amazon EC2) instances

Why using a scheduler?
The solution is easy to deploy and can help reduce operational costs for both development and production environments. Customers who use this solution to run instances during regular business hours can save up to 70% compared to running those instances 24 hours a day.
This article provides an overview of the Instance Scheduler design, functionality and a demonstration of how to achieve this.
Overview
AWS offers a simple solution that allows you to create automatic start and stop schedules for your Amazon EC2 and Amazon RDS instances. The diagram below presents the components and functionality you can build using the Instance Scheduler implementation guide and accompanying the AWS CloudFormation template.

AWS Instance Scheduler architecture
An Amazon CloudWatch event triggers an AWS Lambda function that checks the current state of each appropriately tagged instance against the targeted state defined in an associated schedule in Amazon DynamoDB. Then, the Lambda function applies the applicable start or stop the action to the instance.
The Lambda function also records the name of the schedule, the number of instances associated with that schedule, and the number of running instances as an optional custom metric in Amazon CloudWatch.
The coolest thing about this solution is, it can run multiple regions. For example if you deploy in Sydney, you can control the instances running other regions such as UK, Virginia, Mumbai or Singapore. So this is a completely flexible solution which will save a lot of time and cost, in a more effective manner.
Okay, enough of it and let’s jump to see how to implement this.
Step 01-EC2 Tags
Login to your AWS console and go to EC2 instances.
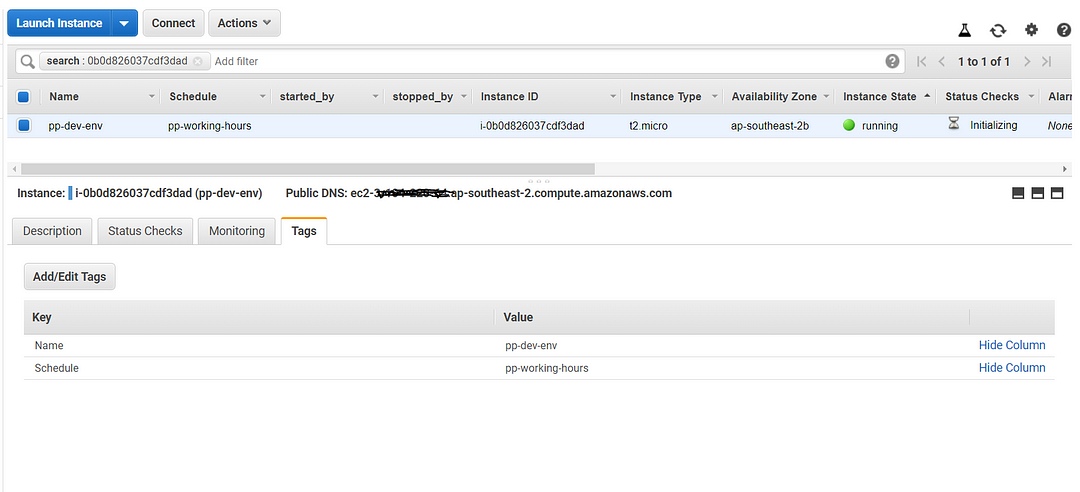
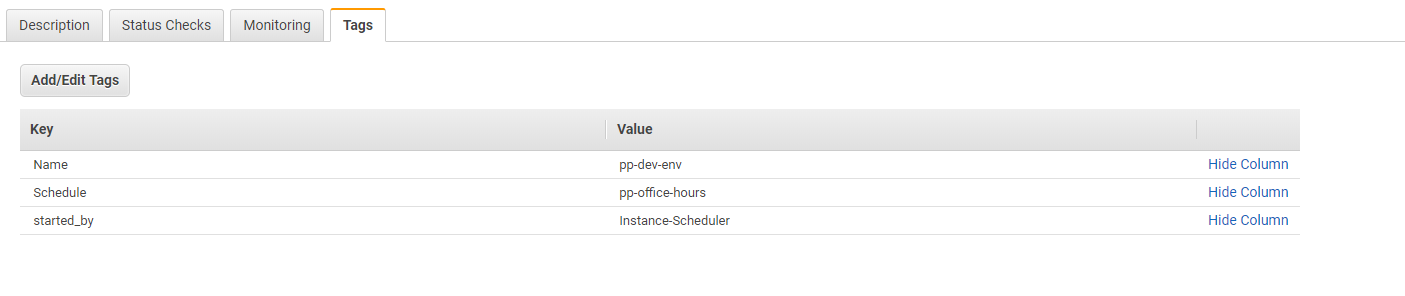
As you can see above, I have created a new tag called “Schedule” and set the value to “pp-working-hours”. (This is how we connect the scheduler to our EC2 instances.)
Step 02-Cloud Formation Template
Every stack in CF is based on a template. A template is a JSON or YAML file that contains configuration information about the AWS resources you want to include in the stack.
- Go to AWS cloud formation and click on “Create Stack”.
- Download the Cloud Formation template from AWS S3 storage
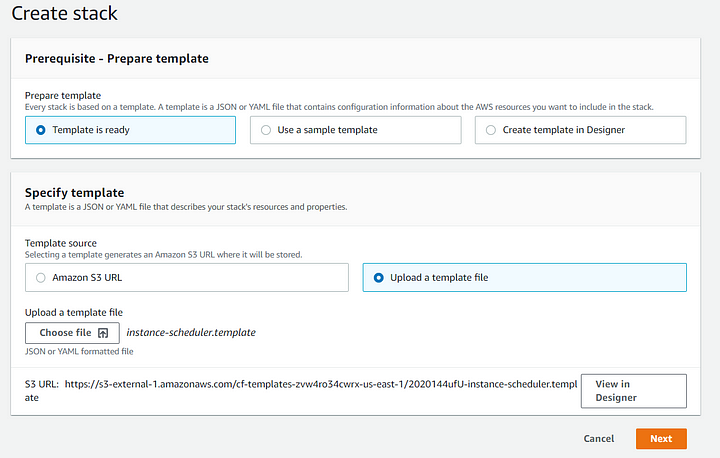
Click on Next and you’ll be redirected to this window
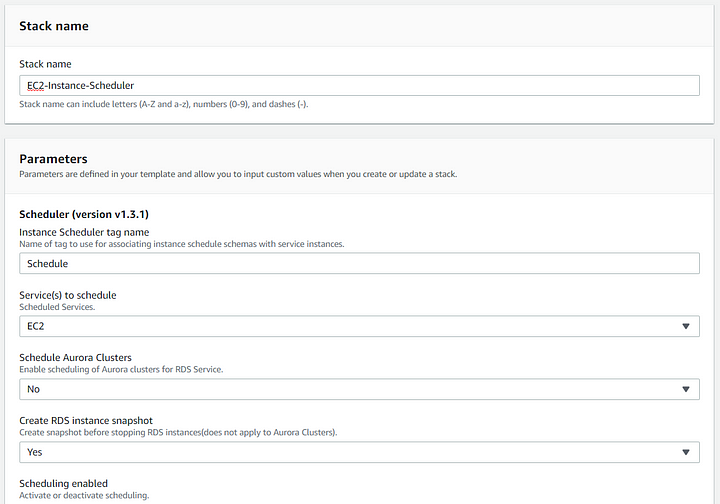
First, give it a nice name like “EC2-Instance-Scheduler” and most importantly under Instance Scheduler Tag name type “Schedule”. Remember this is the same tag that I have used for my “pp-dev-env” EC2 instance in Step 01.
I repeat: This is how we connect the scheduler to our EC2 instances.
Now, Let’s hear the Important questions regarding the above steps.
- Service(s) to schedule, What’s that?
You have the options on the dropdown to select either EC2 or RDS, or you can select Both.] (RDS + EC2), In this case my goal is to automate EC2 start and stop time so I have selected EC2 as my option.
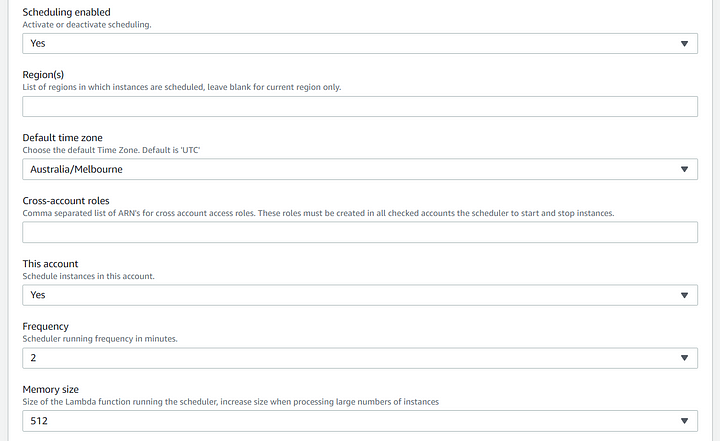
2. Regions, Why is it blank?
Leaving it blank by default select the current region only and since all my instances are deployed in a-south-east-2 region, Left it blank but feel free to select whatever regions you want to select.
3. Default Time Zone
I want all the instance to be run from 8.45 am in the morning to 5.15 pm in AEST (Australian Eastern Standard Time), not in Greenwich time so feel free to select your Time Zone here.
4. Frequence
After 5.15 pm, do you want the instance to shut off after 60 or 5,2 mins? I highly doubt it’s going to be 60 mins because it doesn't make any sense. In this case, by selecting 2min, At around 5.17~5.18 pm, the instance will shut off because that’s the frequency I set at.
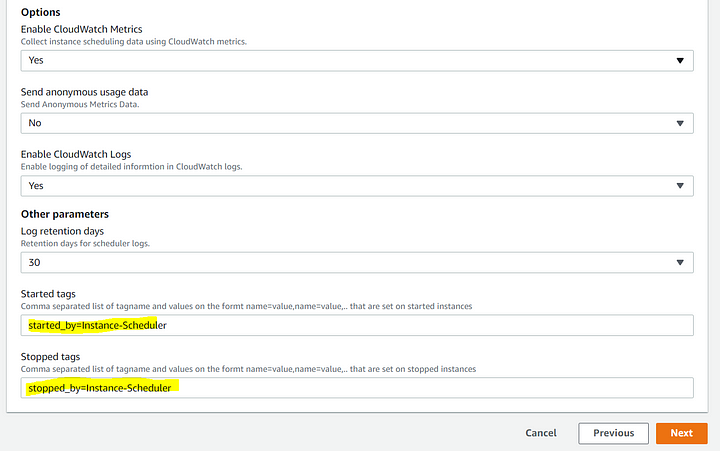
5. Why turning on Cloud Watch Metrics and Logs?
Seriously? Just turn it on man, It’s going to make your life a lot more easier!
6. Started and Stopped Tags?
This is something I highly recommend you all to use, As seen in my screenshot above, Use the following tags.
started_by=Instance-Scheduler
stopped_by=Instance-Scheduler
Wonder why? Because the tag values are going to appear under tags shortly (still it’s blank) and we know who started/stopped the instance.
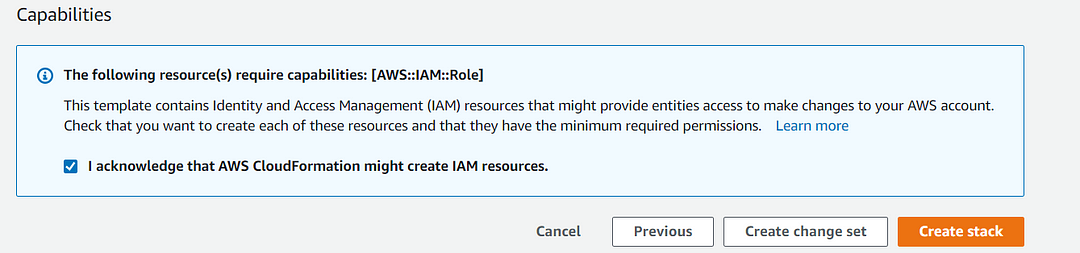
Click on Next and again Next, Until you see this screen (scroll down), and tick the box and click on Create Stack to deploy the CF template using the above configurations that we filled.
So what this going to do is, It will
- Create the Dynamo DB tables
- Create IAM roles
- Setup the Lambda functions
- Update the Dynamo DB tables with the default configuration that we just filled in.
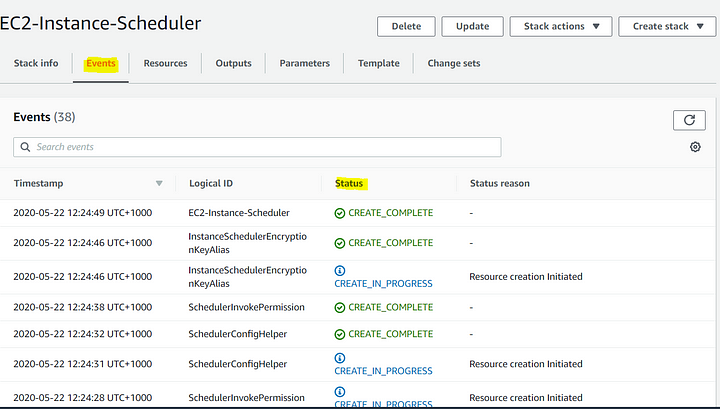
It is going to take a couple of minutes for all this process to be completed and you can see the status of all the resources under the Events tab.
Step 03: Check the Lambda
Go to Lambda functions and you’ll see a new function has created for you.
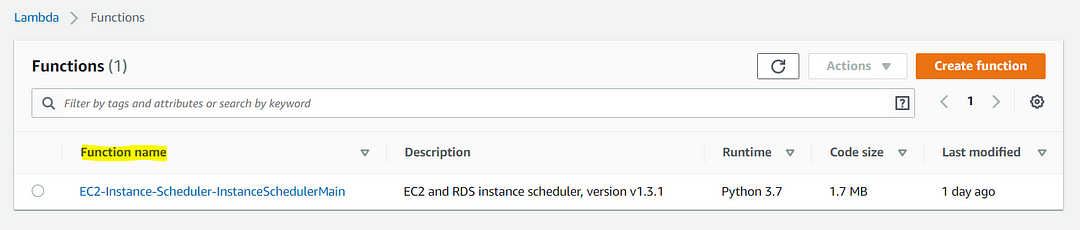
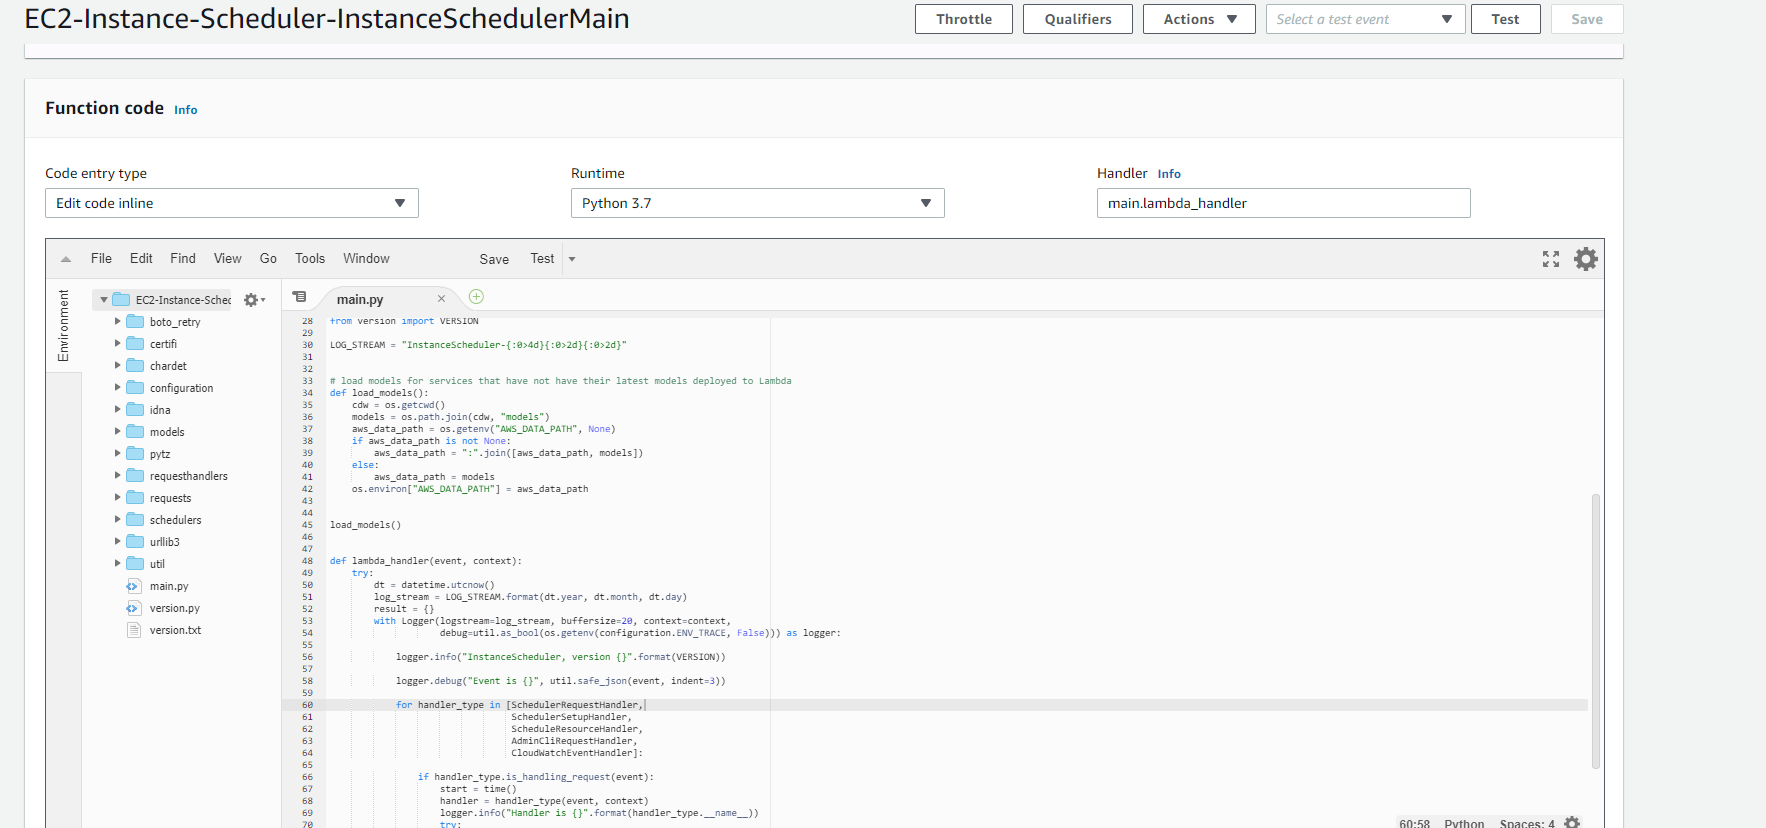
If you’re geek enough to sneak peek into the code, click on the function name, and under configuration tab you can see this beautiful python code sitting there handling the requests and being the mediator between the Dynamo DB and the cloud watch triggers.
Step 04: Paddle the Dynamo
Go to Dynamo DB and click on tables from the left navigation pane.
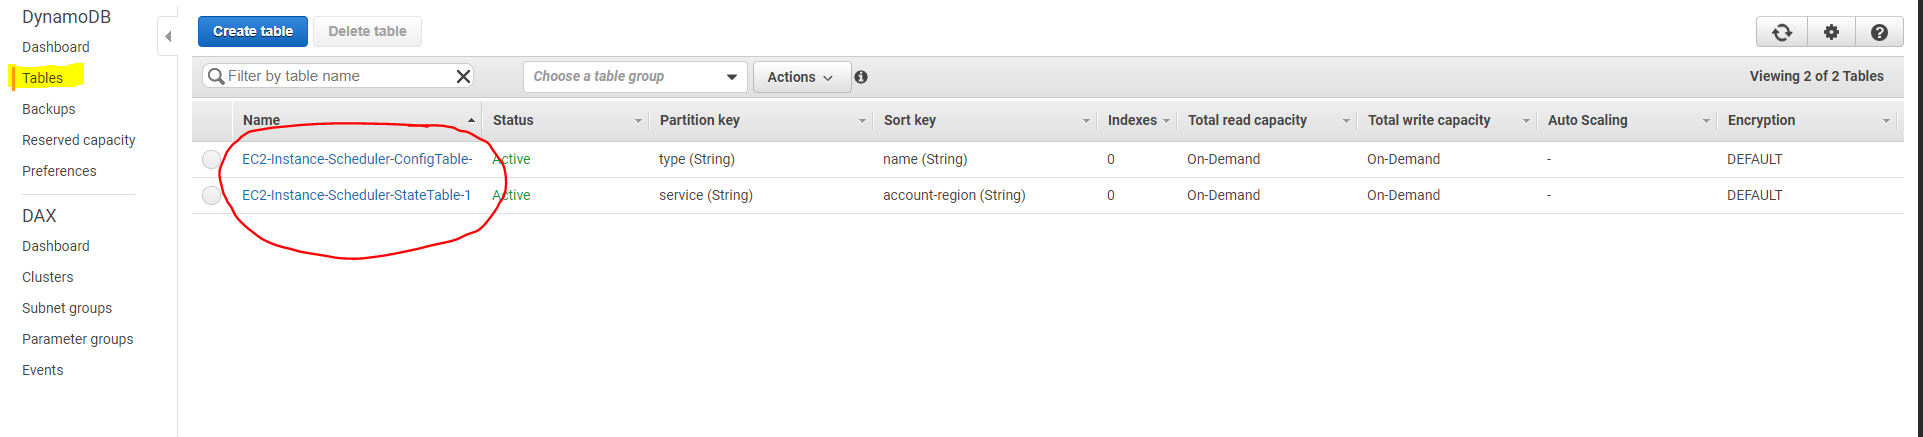
You can see there are two tables created,
- One for Config (EC2-Instance-Scheduler-ConfigTable-XXX)
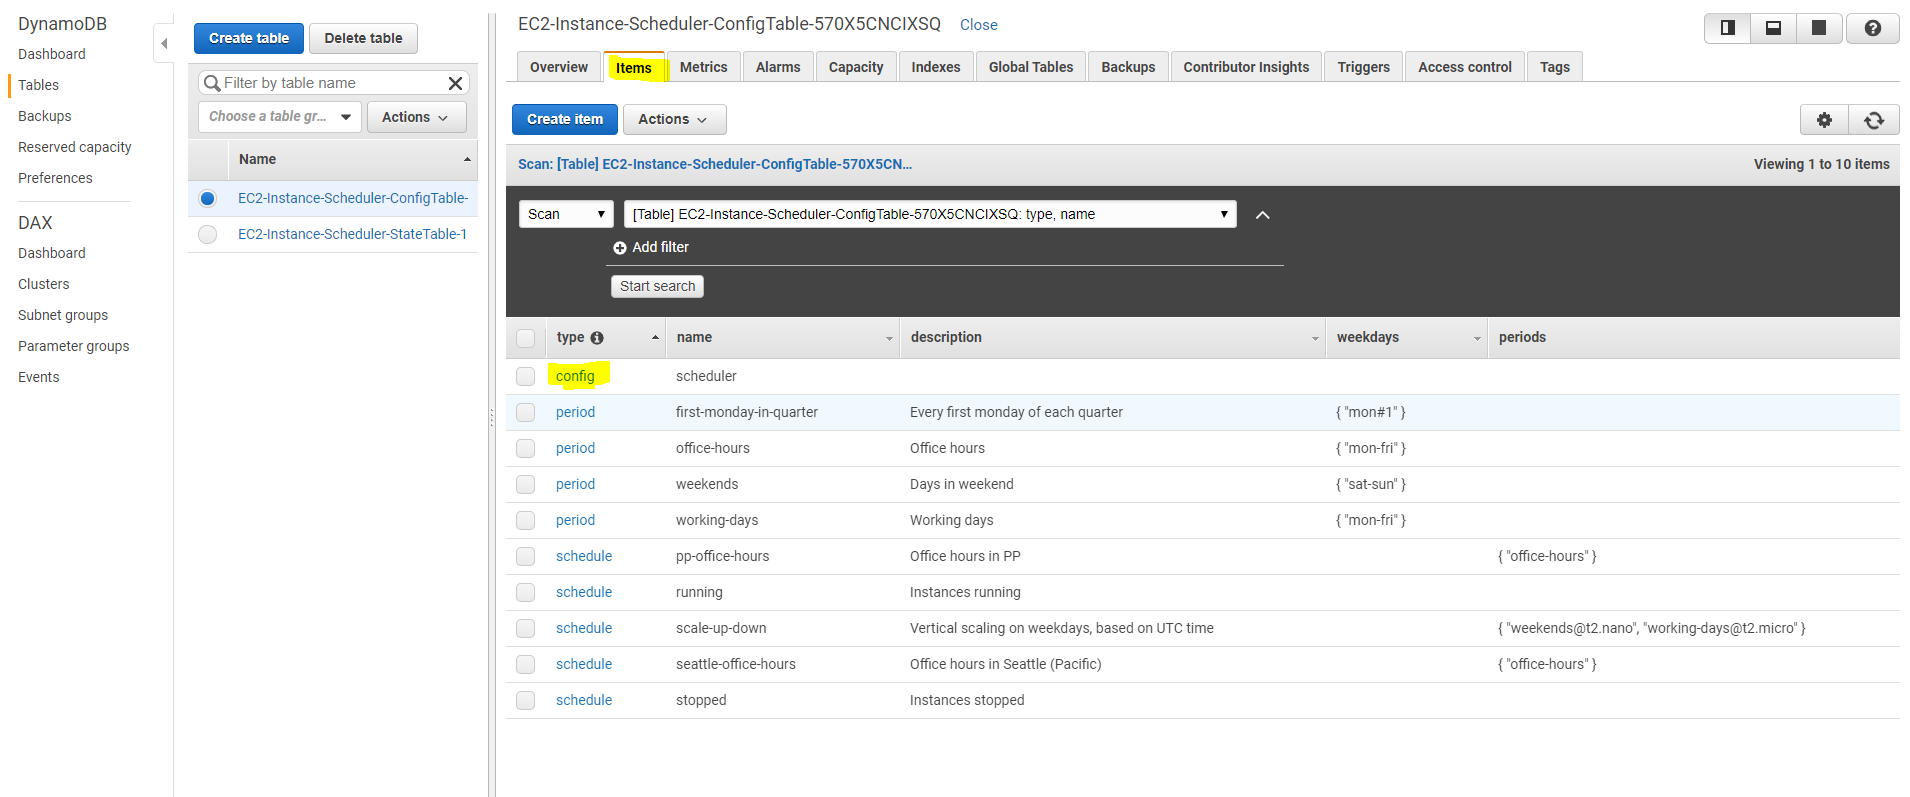
Under config tag, you will find all the metrics that we set earlier in Step 02 (Scroll to the right to see all the variables)
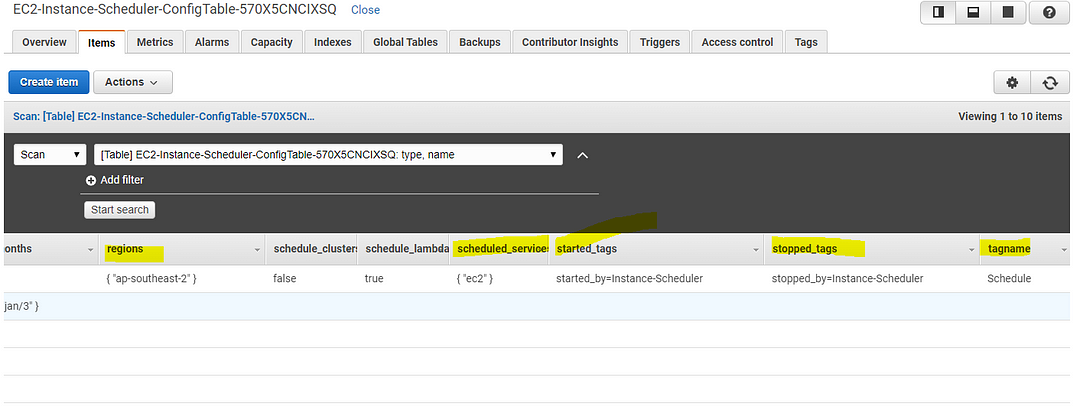
Also, under the type period, you can see pp-working-hours with the following values (You can change these anytime as you want it)
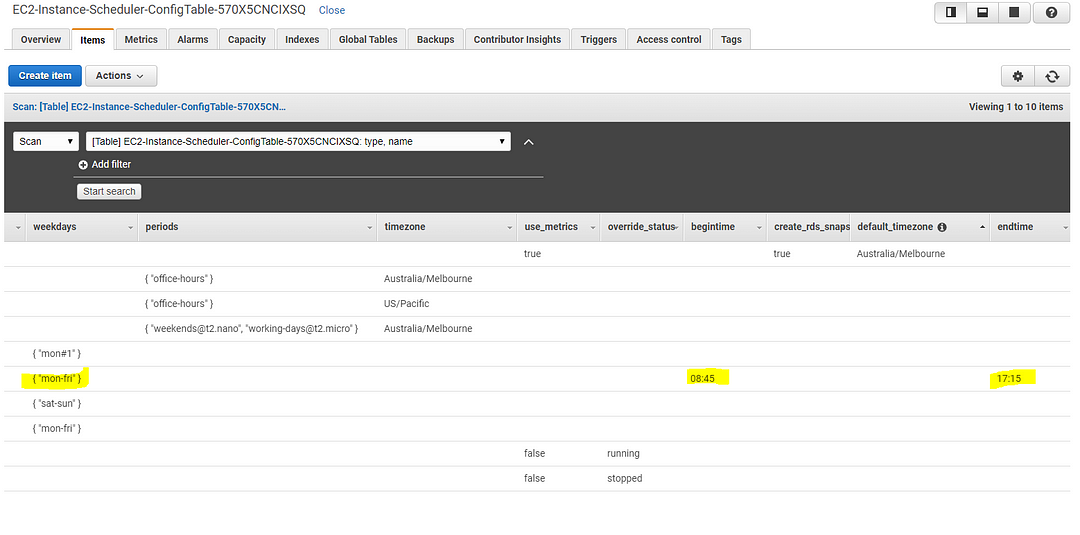
Important: Make sure the timezone is set to Australia/Melbourne in all the matrices otherwise the triggers will not work at all.
2. One for the state (EC2-Instance-Scheduler-StateTable-XXX)
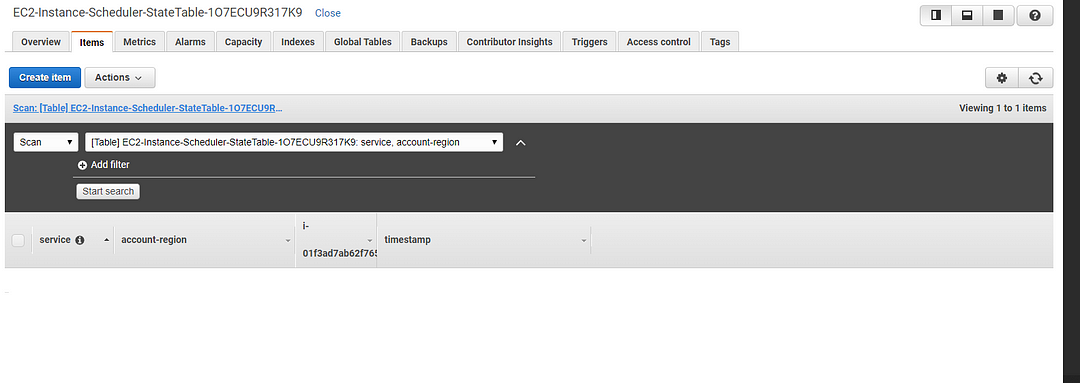
The state table is as for now empty, but as soon as my instance stopped we should be having an entry here.
Example
Currently, the time is 7.47 am in the morning on a Friday so if we wait till 8.15 my instance should start and that means:
- State table should have an entry
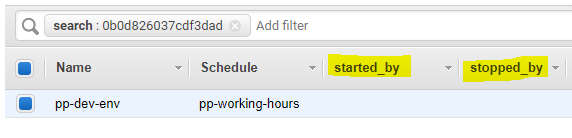
- EC2 instance should have one more tag called “started_by” and the value should be “instance-scheduler”
Now I’m waiting to trigger the cloud watch at 8.15 so my instance should be starting soon.

Okay, here we go!

As you can see (Above and below both images), the tag started_by is having the value of “Instance-Scheduler”.
Let’s check our Dynamo DB’s state table.

As you can see, The Ec2 instance are now scheduled using Lambda functions, Dynamo DB, and Cloud Watch triggers.
This solution is easy to deploy and can help reduce operational costs for both development and production environments. By using this solution to run instances during regular business hours we have saved 72% compared to running those instances 24 hours a day.
So I suggest you the same!
Alright guys, Let me know if you ran into any trouble while trying to deploy this solution. I’m more than happy to help you out!
Thank you and Happy Scheduling!
Here are a couple of other AWS solution deployment articles written by me.
Before moving on with my article, I assume that you have a basic knowledge about AWS and hope you guys have settled inn…www.jayasekara.blog


0 Comments