

Detecting faces in a photograph is easily solved by humans, although has historically been challenging for computers given the dynamic nature of faces.
For example, faces must be detected regardless of orientation or angle they are facing, light levels, clothing, accessories, hair color, facial hair, makeup, age, and so on.
In my previous article, I’ve talked about Face Detecting using Open CV with Haar Cascades. If you didn’t have the chance to go through it yet, you can read it by clicking the following link below.
By using that Model I’ve explained, Running the example on a static photograph, we can see that many of the faces were detected correctly, but the result is not perfect and perhaps better results can be achieved with further tuning, and perhaps post-processing of the bounding boxes.
Face Detection With Deep Learning
There are myriad of methods demonstrated for face detection and out of all methods, the “Multi-Task Cascaded Convolutional Neural Network” or MTCNN for short, described by Kaipeng Zhang, et al. in the 2016 paper titled “Joint Face Detection and Alignment Using Multitask Cascaded Convolutional Networks.”
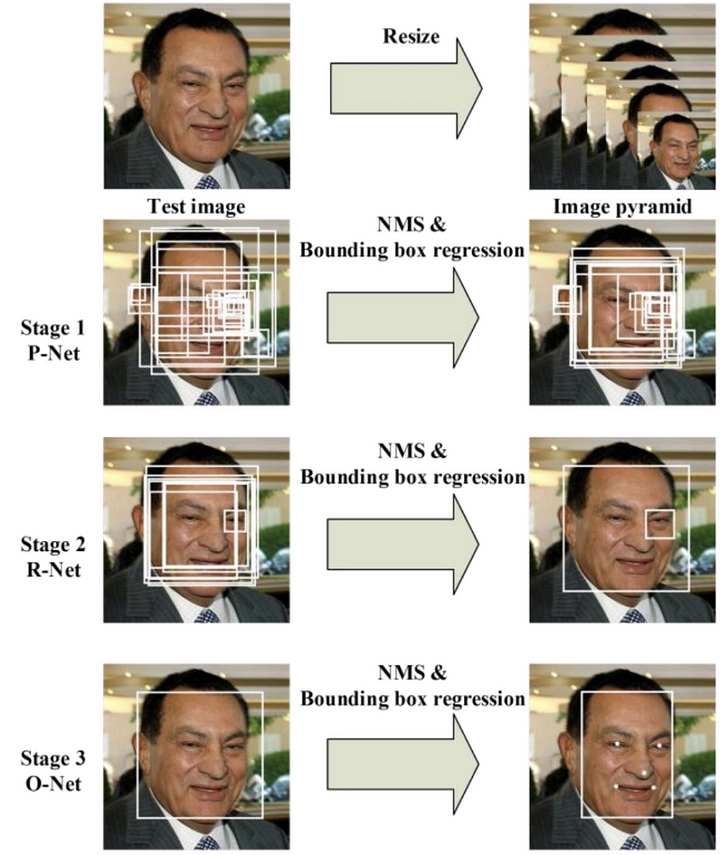
The network uses a cascade structure with three networks; first the image is rescaled to a range of different sizes (called an image pyramid), then the first model (Proposal Network or P-Net) proposes candidate facial regions, the second model (Refine Network or R-Net) filters the bounding boxes, and the third model (Output Network or O-Net) proposes facial landmarks
According to their own words:
“ In this paper, we propose a new framework to integrate these two tasks using unified cascaded CNNs by multi-task learning. The proposed CNNs consist of three stages. In the first stage, it produces candidate windows quickly through a shallow CNN. Then, it refines the windows to reject a large number of non-faces windows through a more complex CNN. Finally, it uses a more powerful CNN to refine the result and output facial landmarks positions. “
The image below taken from the paper provides a helpful summary of the three stages from top-to-bottom and the output of each stage left-to-right.
The model is called a multi-task network because each of the three models in the cascade (P-Net, R-Net and O-Net) are trained on three tasks,
e.g. make three types of predictions; they are: face classification, bounding box regression, and facial landmark localization.
Three models are not directly connected and act as a lap of a sprint race. When one round finishes, the next one starts and so on until the 3rd lap finished.
This allows additional processing to be performed between stages, for example, non-maximum suppression (NMS) is used to filter the candidate bounding boxes proposed by the first-stage P-Net prior to providing them to the second stage R-Net model.
MTCNN architecture is reasonably complex to implement. Thankfully, there are open source implementations of the architecture that can be trained on new datasets, as well as pre-trained models that can be used directly for face detection. Of note is the official releasewith the code and models used in the paper, with the implementation provided in the Caffe deep learning framework.
Perhaps the best-of-breed third-party Python-based MTCNN project is called “MTCNN” by Iván de Paz Centeno, or ipazc, made available under a permissive MIT open source license.
The MTCNN project, which we will refer to as ipazc/MTCNN to differentiate it from the name of the network, provides an implementation of the MTCNN architecture using TensorFlow and OpenCV. There are two main benefits to this project;
- It provides a top-performing pre-trained model.
- It can be installed as a library ready for use in your own code.
Part 1: Install MTCNN
pip install mtcnnWait till all the components get installed.
By default, the library will use the pre-trained model, although you can specify your own model using the ‘weights_file‘ argument and specify a path or URL, for example:
model = MTCNN(weights_file='filename.npy')The minimum box size for detecting a face can be specified via the ‘min_face_size‘ argument, which defaults to 20 pixels. The constructor also provides a ‘scale_factor‘ argument to specify the scale factor for the input image, which defaults to 0.709.
Once the model is configured and loaded, it can be used directly to detect faces in photographs by calling the detect_faces() function.
This returns a list of dict object, each providing a number of keys for the details of each face detected, including:
- ‘box‘: Providing the x, y of the bottom left of the bounding box, as well as the width and height of the box.
- ‘confidence‘: The probability confidence of the prediction.
- ‘keypoints‘: Providing a dict with dots for the ‘left_eye‘, ‘right_eye‘, ‘nose‘, ‘mouth_left‘, and ‘mouth_right‘.
Part 2: Python Script
Step01: Detecting Faces
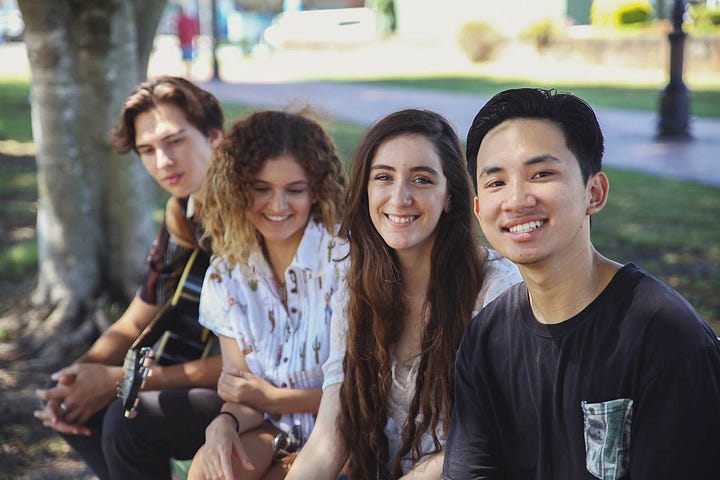
* Let’s run a face detection on this following College Students Image
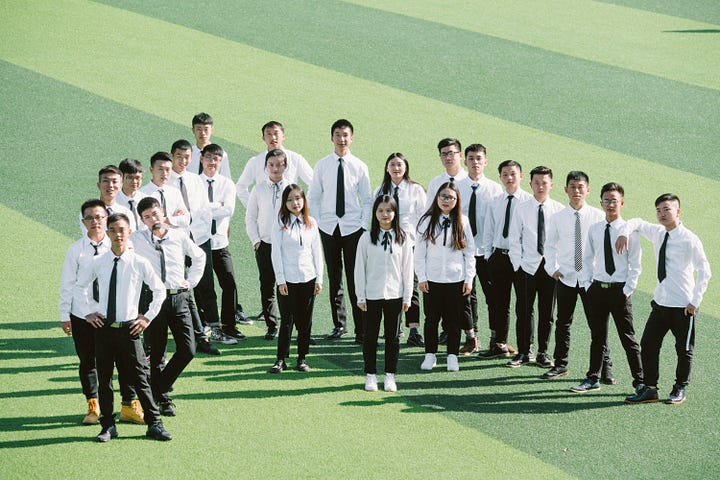
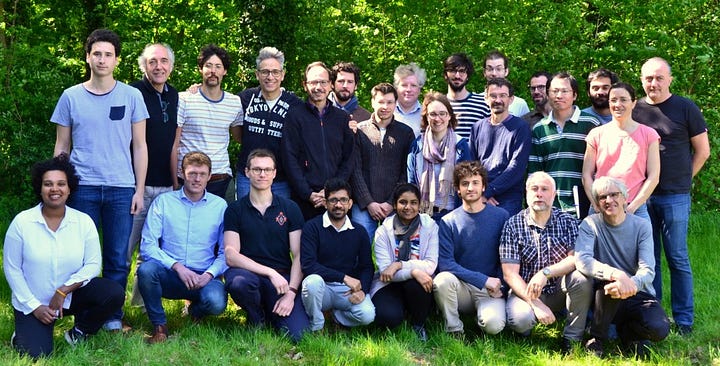
And this group photo:
Baby steps; Let’s try the first image since it has only four people.
#face detection with mtcnn on a photographfrom matplotlib import pyplot
from mtcnn.mtcnn import MTCNN#load image from filefilename = 'fl.jpg'pixels = pyplot.imread(filename)#create the detector, using default weightsdetector = MTCNN()#detect faces in the imagefaces = detector.detect_faces(pixels)for face in faces:
print(face)By running this script; Our college student’s image loads, and then loads the model, perform face detection and prints a list of each face detected.

Each box lists the x and y coordinates for the bottom-left-hand-corner of the bounding box, as well as the width and the height. And as I’ve mentioned above Keypoints are generated such ‘left_eye‘, ‘right_eye‘, ‘nose‘, ‘mouth_left‘, and ‘mouth_right‘. The results suggest that four (4)bounding boxes were detected. Which means there are four faces.
Step 02: Draw Squares on detected Faces
#get coordinatesx, y, width, height = result['box']#create the shaperect = Rectangle((x, y), width, height, fill=False, color='red')Step03: Draw circles on Keypoints
#draw the dotsfor key, value in result['keypoints'].items():
#create and draw dot
dot = Circle(value, radius=2, color='red')
ax.add_patch(dot)Below is a function named draw_image_with_boxes() that shows the image and then draws a red square for each bounding box detected.
def draw_image_with_boxes(filename, result_list): #load the image
data = pyplot.imread(filename) #plot the image
pyplot.imshow(data) #get the context for drawing boxes
ax = pyplot.gca() #plot each box for result in result_list: #get coordinates
x, y, width, height = result['box']
#create the shape
rect = Rectangle((x, y), width, height, fill=False, color='red') #draw the box
ax.add_patch(rect)
#show the plot
pyplot.show()Running the example plots the photograph then draws a bounding box and facial key points for each of the detected faces.
Step 03: Run and Detect the box Faces
We can see that all the faces (4) were detected correctly and all the keypoints are fairly accurate.

Now, Let’s try the complex image with dozen of people in it.

Step 04: Extract Each face separately
We may want to extract the detected faces and pass them as input to another system.
This can be achieved by extracting the pixel data directly out of the photograph; for example:
# get coordinatesx1, y1, width, height = result['box']x2, y2 = x1 + width, y1 + height# extract faceface = data[y1:y2, x1:x2]We can demonstrate this by extracting each face and plotting them as separate subplots. You could just as easily save them to file. The draw_faces() below extracts and plots each detected face in a photograph.
# draw each face separately
def draw_faces(filename, result_list):
# load the image
data = pyplot.imread(filename)
# plot each face as a subplot
for i in range(len(result_list)):
# get coordinates
x1, y1, width, height = result_list[i]['box']
x2, y2 = x1 + width, y1 + height
# define subplot
pyplot.subplot(1, len(result_list), i+1)
pyplot.axis('off')
# plot face
pyplot.imshow(data[y1:y2, x1:x2])
# show the plot
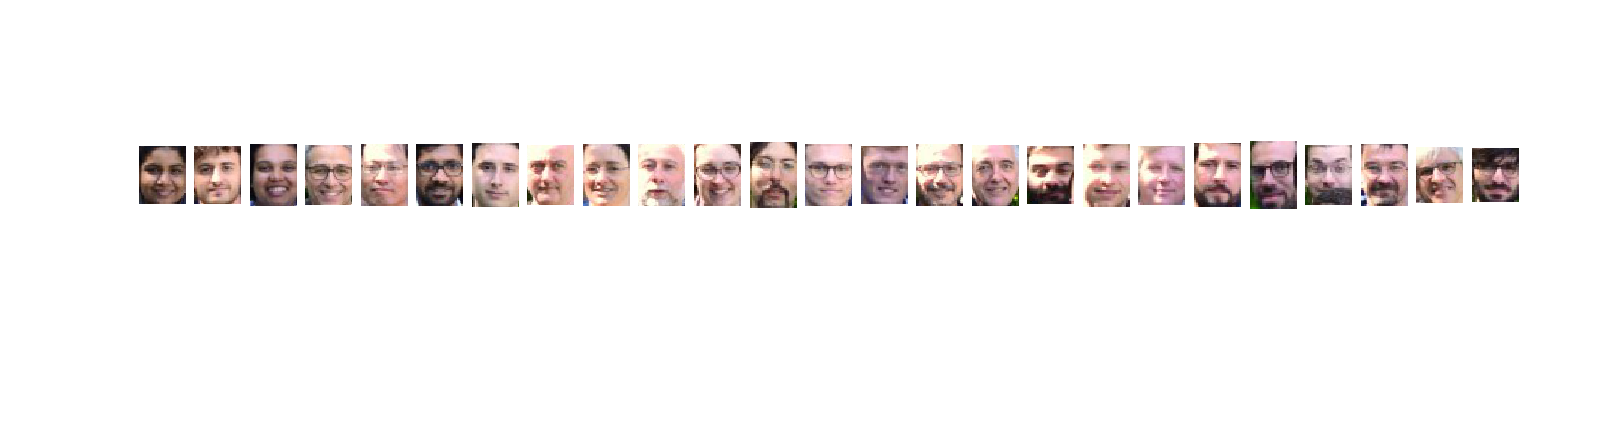
pyplot.show()Running the example creates a plot that shows each separate face detected in the photograph of the second group photo.
You can access the full source code from here. It has 4 separate Python Scripts and I’m sure you can understand what each means by reading the name of the script file.
All this knowledge is Thanks to https://www.linkedin.com/in/jasonbrownlee/ (Jason Brownlee) and Connect me on LinkedIn https://www.linkedin.com/in/dilanjayasekara/
Keen on getting to know me and my work? Click here for more!
Thanks!
Here's a gift for all those who stayed till the end :)
Okay, without further ado: Let's Jump up direct to the question again. What are the best books about data science? For…www.jayasekara.blog


0 Comments